Rachel's Crafty Folder

for my crafty moments

steampunk shamrock 27/12/2012

Filed under: Challenges,My Minds Eye,Spellbinders,Stampendous — rachelscraftyfolder @ 9:21 pm

Lucky ShamrockGood Evening All

Well as Christmas is now over I decided that today I would make a card for a colleague of mine, who has chosen to venture onto pastures new in the New Year.

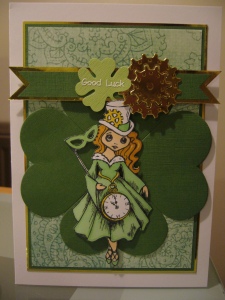
I have used the current Mojo Monday challenge layout on a 5×7 card base.  The paisley background paper is from My Minds Eye Bloom & Grow collection and this has been matted and layered onto some dark green cardstock and some gold mirri card.  The large shamrock shape has been made using 4 heart shaped dies, which when stuck together give the appearance of a 4 leaf clover – at least I thought so!

The image is from Stampendous and I stamped her using Black Memento and then coloured her with my new Spectrum Noirs, which my Mum bought me for Christmas 😀  I have cut her out and mounted her onto the shamrock using 3d foam pads.

The cogs have been cut using spellbinder dies, and the little shamrock is a Sizzix die to which I’ve added the Good Luck peel off.  Not quite a true steampunk style card, but it’s a start!

I’m still learning how to use the Spectrum Noirs correctly, haven’t managed to fully watch the DVD that came with them yet – all in good time, still got a week before I need to think about work 🙂

Anyway, that’s all for now, but I’ll be back again soon

Rachel


Crackers… 24/12/2012

Filed under: Spellbinders,Stampin Up — rachelscraftyfolder @ 3:00 pm

Christmas CrackersHappy Christmas Everyone,

One last little treat before the big day!

My Dad wanted something to give to the ladies that he goes Bowling with, so I suggested to him some little handmade Christmas Crackers, that way it’s like a card and a gift all in one 🙂

Thankfully I’d had a class with Sonia a few days before, and she’d shown us how to make these hexagonal crackers.  I’ve adjusted the size of mine slightly, from the instructions Sonia gave us, to make them a wee bit smaller.  I’ve used some double sided First Edition Festive Treats heavy-weight cardstock for the actual basic cracker.  I’ve then used a Martha Stewart Snowflake punch to decorate the edges, before sticking the shape together.

To decorate, I’ve used a label punch from Stampin Up and some of my Spellbinder Snowflake dies, a little gem and some sparkly ribbon, and each cracker contains 4 little santa shaped chocolates.  Only had 12 to make, so it didn’t take me long and apparently they have been well received.

So this may well be my last blog entry for 2012, depends on whether I get to craft much over the next week, we’ll see!

Back again soon

Rachel


Rudolph Treats 18/12/2012

Filed under: Stampin Up — rachelscraftyfolder @ 6:30 pm

Rudolph Treats Good Evening All

A very quick post this evening, just for the fun of it.

These little fella’s were a gift from our crafty tutor, Sonia, at a class a few weeks back.  She had made us one each to take away, and I thought they were so cute 🙂  So I have decided, in my infinite wisdom, to make one for each of my team at work, as a little gift instead of Christmas Cards.

They are so easy to do.  The body has been made with the “two tags” die from Stampin Up.  Add some googly eyes, a bit of card candy and some ribbon and away you go.

I just think they are a brilliant idea and something a bit different.

Anyway, that’s all for now, dinner is ready!

Back again soon

Rachel


Mother’s Birthday 09/12/2012

Filed under: Hunkydory,Stampin Up — rachelscraftyfolder @ 8:05 pm

Mother's Birthday CardGood Evening All

Apologies for the lack of blogging for the last month, but I’ve had an operation on my left shoulder recently and bearing in mind I’m left handed, this has made crafting somewhat impossible, never mind anything else!  I’m slowly getting back to normal (whatever that is 😛 ) so this week I decided I ought to have a go at making my Mum’s birthday card.

I’ve gone for a vintage effect, as I decided to use this topper and backing card from Hunkydory’s Vintage Journey collection.  I’ve used a cream A5 card base and a layout from the DoCrafts website.  I’ve matted the backing card and the topper sections onto gold mirri card and then cut the “mother” word with cream card using my Heritage Cricut cartridge.  The cream lace ribbon is from Stampin Up and then the flourishes are a Marianne die and again have been cut in cream card.  To distress the cream card slightly I have used Frayed Burlap Distress Ink and my ink duster brushes, as this just takes away the crispness of the colour.

I think my Mum liked it?  She’s a crafter as well, so for her pressie I treated her to some Perfect Layer tools, which I hope she finds helpful.

Anyway, I’m still struggling a bit with my crafting, but hopefully will be back again soon 🙂

Rachel